Zone Configuration Using the Web UI
This section describes how to use the web UI to configure a security zone.
Creating a Security Zone
A FW has four default security zones. You can create security zones and define security levels.
- Choose .
- Click Add.
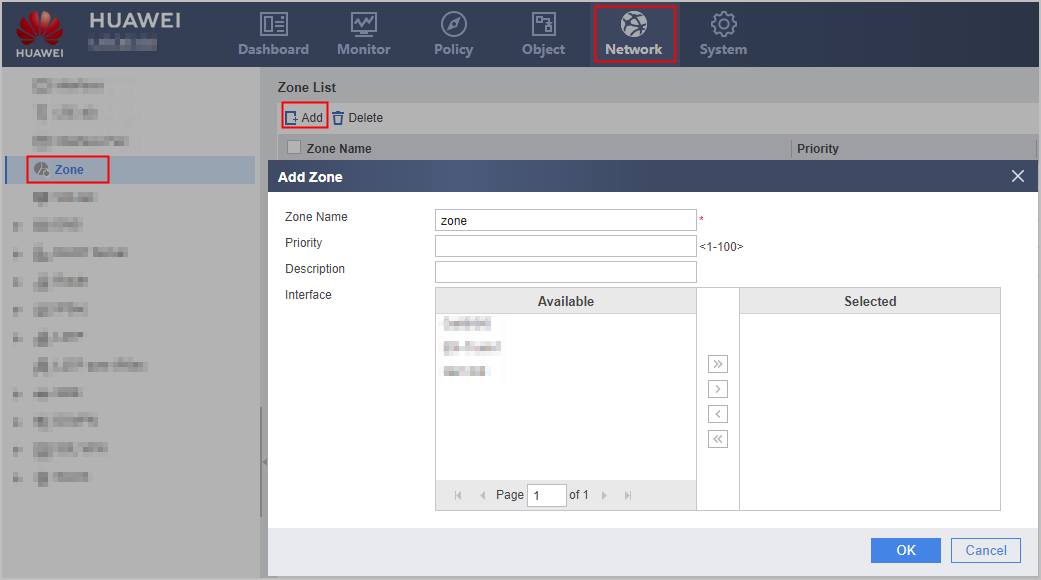
- Set the following security zone parameters.
Parameter
Description
Zone Name
Name of a security zone. The name of the security zone cannot be changed once it is configured.
The value must be different from the name of an existing security zone.
Priority
Priority of a security zone. The higher the priority, the higher the security level.
The value must be different from the priority of an existing security zone.
When configuring the interzone ASPF/ALG or interzone SACG interworking policy, you need to set the priority for the security zone. Otherwise, the interzone ASPF/ALG or interzone SACG interworking policy does not take effect. You do not need to configure the priority when configuring other services. Two security zones that are not configured with priorities cannot form an interzone, and priorities of two security zones that form an interzone cannot be deleted.
Description
Description of a security zone.
To help users learn about a security zone, enter a meaningful description. Use a specific description for each security zone.
- Click Apply.
If the Operation succeeded dialog box is displayed, the security zone is successfully created.
Repeat the previous operations to create more security zones with different security levels.
Assigning Interfaces to Security Zones
You have to add interfaces to a security zone, except a local zone, before using the security zone. After that, all packets on the interface are considered as in the security zone.
An interface can only be assigned to a single security zones.

A Local zone defines a device itself, including the interfaces on the device. Although an interface is assigned to a security zone, only the network connected to the interface is in the security zone, and the interface is in the Local zone.
- Choose .
- Perform either of the following methods to enter the operation page before adding interfaces to security zones:
- After a security zone is created, perform operations on the Add Zone page.
- Click
 of the line where the entry to be modified resides and enter the Modify Zone operation page.
- In Select Zone Interface, perform one of the following operations:
On the Un-Added Interface page, double-click a desired interface. This interface appears in the Added Interface window.
On the Un-Added Interface page, select a desired interface and click
 . This interface appears in the Added Interface window.
Click
 to assign all interfaces to the current security zone.
- Click OK.