Web: Example for Logging in to the CLI Using the Telnet (RADIUS Server Authentication)
By default, Telnet is disabled on the device. You need to establish a Telnet login environment. This section provides an example for configuring how to log in to the CLI using Telnet.
Networking Requirements
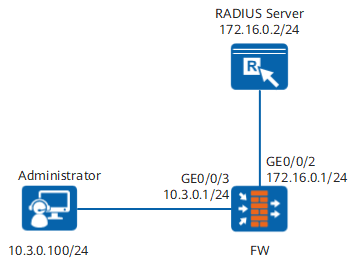
Figure 1 shows that the FW has a local administrator. The local administrator has some administrator permissions and can use Telnet to log in to the CLI only from a local PC for FW management and maintenance. RADIUS server authentication takes precedence over local authentication. The FW implements local authentication on administrators only when the RADIUS server does not respond.
Data Planning
Item |
Data |
Description |
|---|---|---|
Administrator account/password |
vtyadmin/Mydevice@abc |
The account name and password should be easy to remember. |
RADIUS server template |
Name: radius_server RADIUS server address: 172.16.0.2 Password: Admin@123 |
- |
Administrator PC IP address |
10.3.0.100/255.255.255.0 |
- |
Role |
service-admin |
service-admin is a user-defined role and has permissions only on the network, policy, and object. |
Trusted host |
10.3.0.0/24 |
- |
Authentication Type |
RADIUS and local |
- |
Configuration Roadmap
- Configure the login interface.
- Set the IP address for the interface and add the interface to a security zone.
- Configure a security policy to permit the access from the firewall to the server.
- Configure a RADIUS server template.
- Create an administrator role.
- Create an administrator. Then set the authentication type, administrator role, and trusted host for the administrator.
- Enable the Telnet service.
- Set the IP address for the administrator PC. Then use the Telnet client to log in to the VTY interface.
Procedure
- Optional: Configure the login interface.

If you use the default settings of management interface to log in to the device, skip this step.
Because the default IP address of the management interface has been set to 192.168.0.1, the interface has been added to the Trust zone, and the administrator is allowed to log in to the device using HTTPS.
- Click
 for interface GE0/0/3 and set the parameters as follows:
Zone
trust
Connection Type
Static IP
IP Address
10.3.0.1/255.255.255.0
Management Access
Telnet
- Click
- Set the IP address for the interface and add the interface to a security zone.
- Click for interface GE0/0/2 and set parameters as listed in the following table.
Zone
dmz
Connection Type
Static IP
IP Address
172.16.0.1/255.255.255.0
- Click
- Configure a security policy to permit the access from the firewall to the server.
- Configure a RADIUS server template.
- Choose .
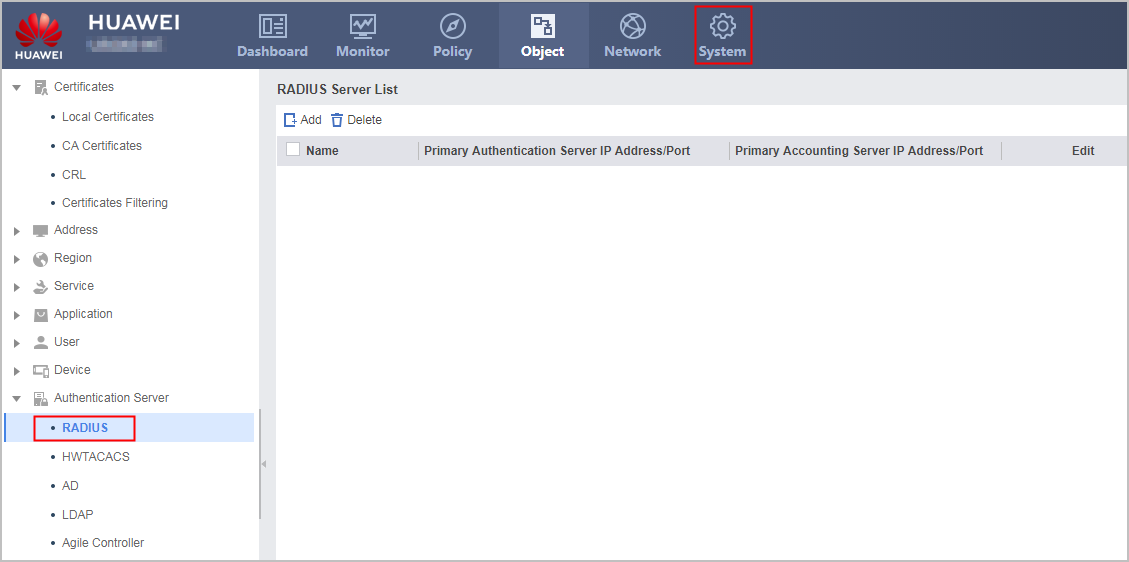
- Click Add.
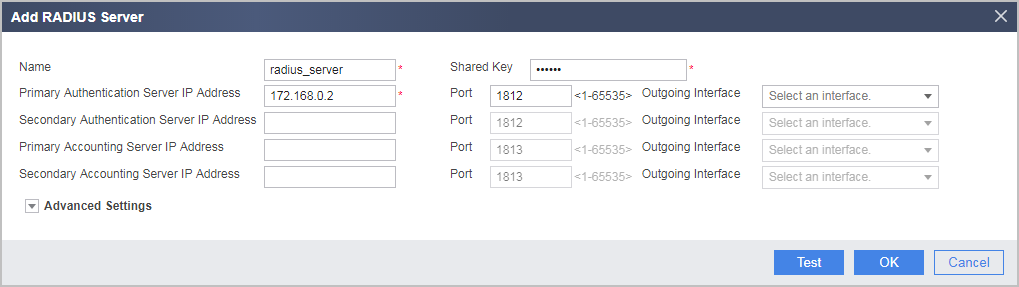
- Set the RADIUS server parameters as shown in the following figure.
Parameters set on the FW must be consistent with those set on the RADIUS server.
- Click Detection and then OK in the dialog box that is displayed. Then enter the account name and password obtained from the RADIUS server. Then click Start Checking to check the connectivity to the RADIUS server.
If the connectivity check succeeds, click Cancel.
- Click OK.
- Choose .
- Optional: Create an administrator role.
Ignore this step if the default administrator role is used.
- Choose .
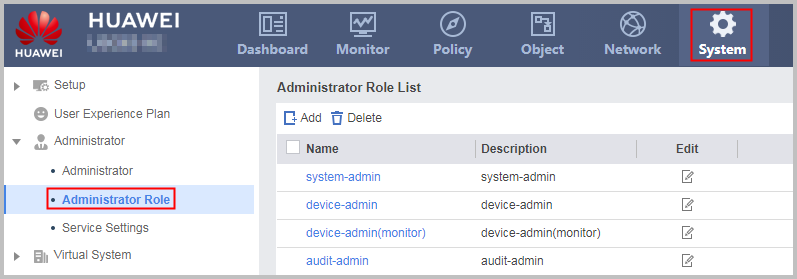
- Choose .
- Create an administrator. Then set the authentication type, administrator role, and trusted host for the administrator.
- Choose .
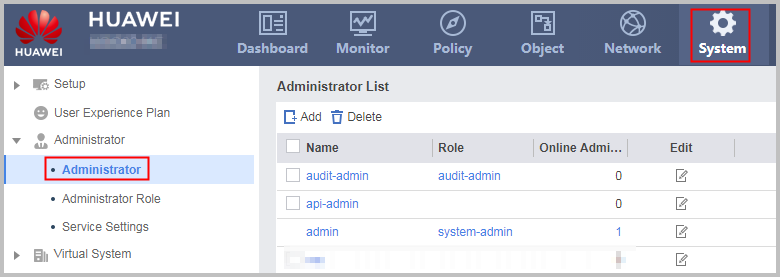
- Click Add and set the parameters as follows:
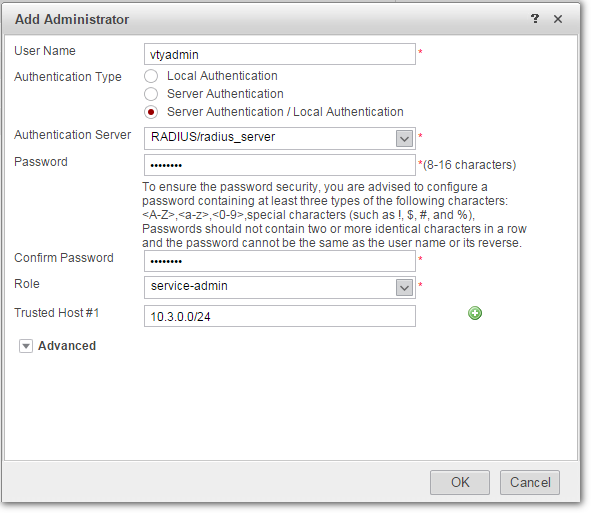
The value of User Name must be the account name obtained from the RADIUS server.
- Choose .
- Enable the Telnet service.
- Choose .
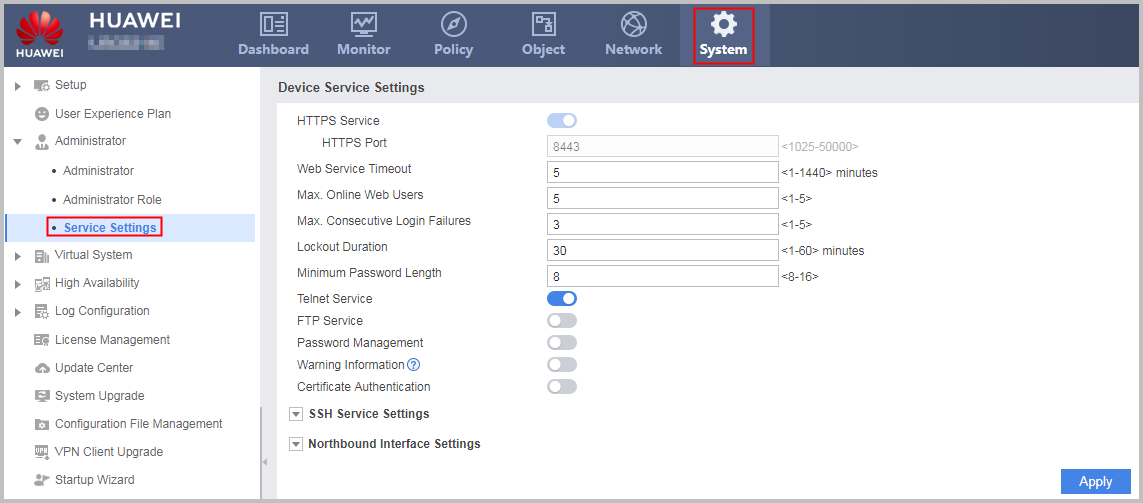
- Choose .
- Click Save on the upper-right corner and click OK in the dialog box that is displayed.
- Set the IP address for the administrator PC. Then use the Telnet client to log in to the VTY interface.
Configuration Scripts
#
telnet server enable
#
interface GigabitEthernet0/0/2
 ip address 172.16.0.1 255.255.255.0
#
interface GigabitEthernet0/0/3
 ip address 10.3.0.1 255.255.255.0
 service-manage enable
 service-manage telnet permit
#
user-interface vty 0 4
 authentication-mode aaa
 protocol inbound telnet
 user privilege level 3
 idle-timeout 5
#
acl number 2001
 rule 5 permit source 10.3.0.0 0.0.0.255
 rule 10 deny
#
aaa
 authentication-scheme radius
  authentication-mode radius local
 #
 manager-user vtyadmin
  password cipher %@%@*y:3*ZN}.%%qcL1cCyDwlB.|@XBVMDWq'6JF(iOz2D8>A\SN%@%@
  service-type telnet
  level 15
  acl-number 2001
  authentication-scheme radius
  radius-server radius_server
 #
 bind manager-user vtyadmin role service-admin
 role service-admin
  description policy_object_network_readwrite_and_other_modules_none
 dashboard none
 monitor none
 system none
 network read-write
 object read-write
 policy read-write
#
radius-server template radius_server
 radius-server authentication 172.16.0.2 1812
 radius-server shared-key cipher %@%@*y:3*ZN}.%%qcL1cCyDwlB.|@XBVMDWq'6JF(iOz2D8>A\SN%@%@
 test-aaa testname testpassword radius-template radius_server
#
firewall zone trust
 set priority 85
 add interface GigabitEthernet0/0/3
#
firewall zone dmz
 set priority 50
 add interface GigabitEthernet0/0/2
#
security-policy
 rule name rule1
  source-zone local
  destination-zone dmz
  destination-address 172.16.0.2 32
  action permit
#
return