Configuring Information Push
This section describes the template of the push information page and how to customize the push information page as required.
Context
The push information is the text message or notification sent from the FW to the user interface. If the URL matches the URL filtering profile and the configured action is block, the FW will push a notification to the user. The following figure shows the types of pushed messages.
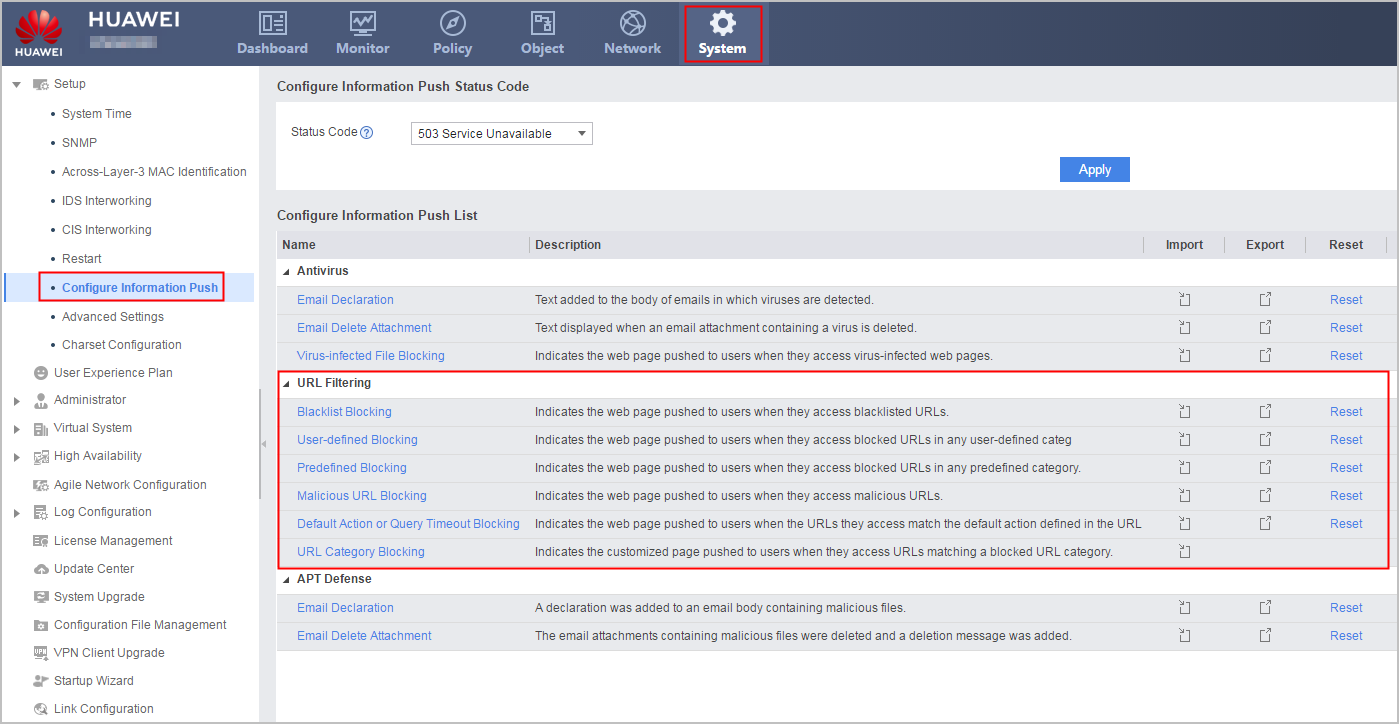
You can directly use the default push information template, modify the content of the push information page as required, or embed pictures on the push information page.
In addition, if the HTTP status code of the push information fails to meet your requirement, you can modify the HTTP status code.
Push Information Template
Blacklist Blocking Configuration, User-defined Blocking Configuration, Pre-defined Blocking Configuration, Default Action or Query Timeout Blocking Configuration, Malicious URL Blocking Configuration or URL Category Blocking, under URL Filtering push information template, as shown in the following figure.
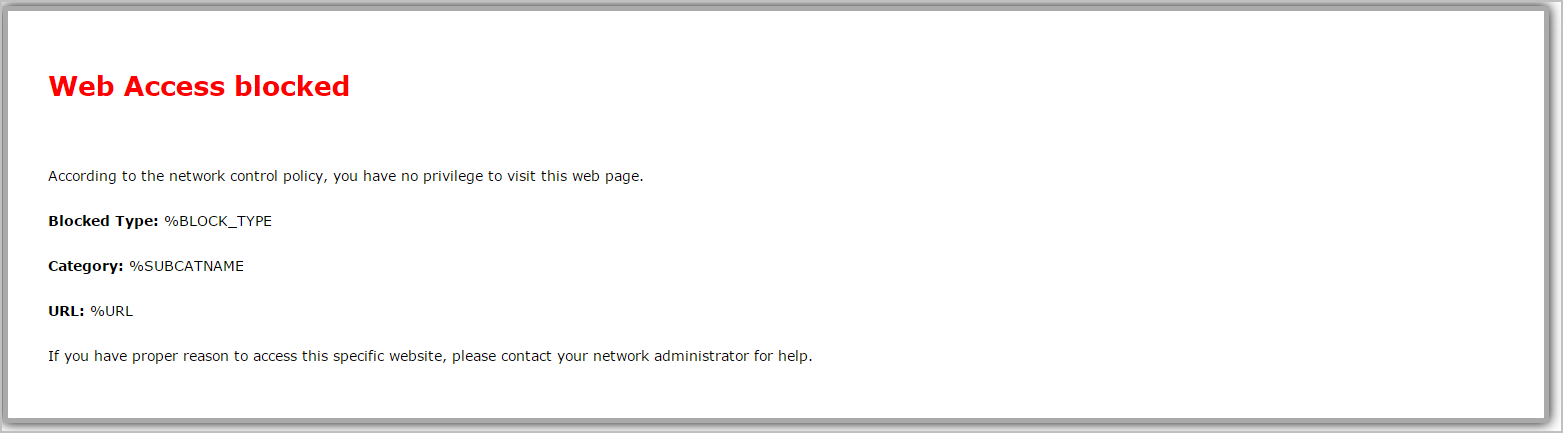
In the URL Filtering notification template, parameter %BLOCK_TYPE indicates the reason that a URL is blocked, %SUBCATNAME indicates the name of a predefined subcategory, and %URL indicates the URL accessed by the user. The FW automatically replaces %BLOCK_TYPE, %SUBCATNAME, and %URL with the actual values when sending notification messages.
You can add parameter %CATNAME in the notification template to represent the predefined category of a URL. The FW automatically substitutes %CATNAME with the actual value when sending notification messages. Parameter %CATNAME can reside at any position in a notification message.
If a notification message has multiple same parameters (%BLOCK_TYPE, %SUBCATNAME, %URL, or %CATNAME), the FW substitutes the first one by default and directly outputs other parameters as characters when sending the notification message.
Customizing Push Messages
- Choose .
- Optional: Configure the HTTP status code of the push information.Select the following status codes and click Apply.
- 401 Unauthorized: Indicates that the request is not authorized.
- 403 Forbidden: Indicates that the server request is denied.
- 404 Not Found: Indicates that the request fails.
- 503 Service Unavailable: Indicates that the server cannot process the request currently.
By default, the HTTP status code of the push information is 503.
- Download the notification template.
-
Click URL Category Blocking under URL Filtering. Alternatively, you can click the corresponding Import. Click Add under URL Category Push Page List. Then download the notification template to the local computer.
URL Category Blocking is used to customize push pages for different URL categories (including user-defined and predefined categories), so that different messages can be pushed based on URL categories. For example, when a user hopes that the push page of the streaming media contains payment information, the push page can be customized based on this requirement. After the configuration, when the user accesses the streaming media website, the request is blocked, and the customized push information about the streaming media is pushed to the user. In a scenario where the action for the URL category matched by the traffic is block and no push page is customized for this URL category:
- If the matched URL category is a user-defined one, the User-defined Blocking Configuration page is pushed.
- If the matched URL category is a predefined one, the Pre-defined Blocking Configuration page is pushed.
Other blocking configurations.
Click Blacklist Blocking Configuration, User-defined Blocking Configuration, Pre-defined Blocking Configuration, Malicious URL Blocking Configuration or Default Action or Query Timeout Blocking Configuration under URL Filtering. Alternatively, you can click the corresponding Import. Then download the notification template to the local computer.
-
- Edit the notification content or embed images in the template.
<> indicates the Hypertext Markup Language (HTML). Change the content between <> and </>. The notification template contains a maximum of 21,504 (21*1024) characters.
For details about how to embed images on the push information page, see Embedding Images in the Push Information Page.
- Import the modified push information page.
-
Click URL Category Blocking under URL Filtering. Alternatively, you can click the corresponding Import. Click Add under URL Category Push Page List. Then click Browse and select the template file where the notification has been configured. Click OK. The new notification takes effect after the template is successfully imported.
Other blocking configurations.
Click Blacklist Blocking Configuration, User-defined Blocking Configuration, Pre-defined Blocking Configuration, Malicious URL Blocking Configuration, or Default Action or Query Timeout Blocking Configuration. Alternatively, you can click the corresponding Import. Then click Browse and select the template file where the notification has been configured. Click Import. The new notification takes effect after the template is successfully imported.
-
Embedding Images in the Push Information Page
The push information page is in HTML format. Generally, images are placed in HTML files through links. To cope with changes in image links, you can embed the image content in HTML files.
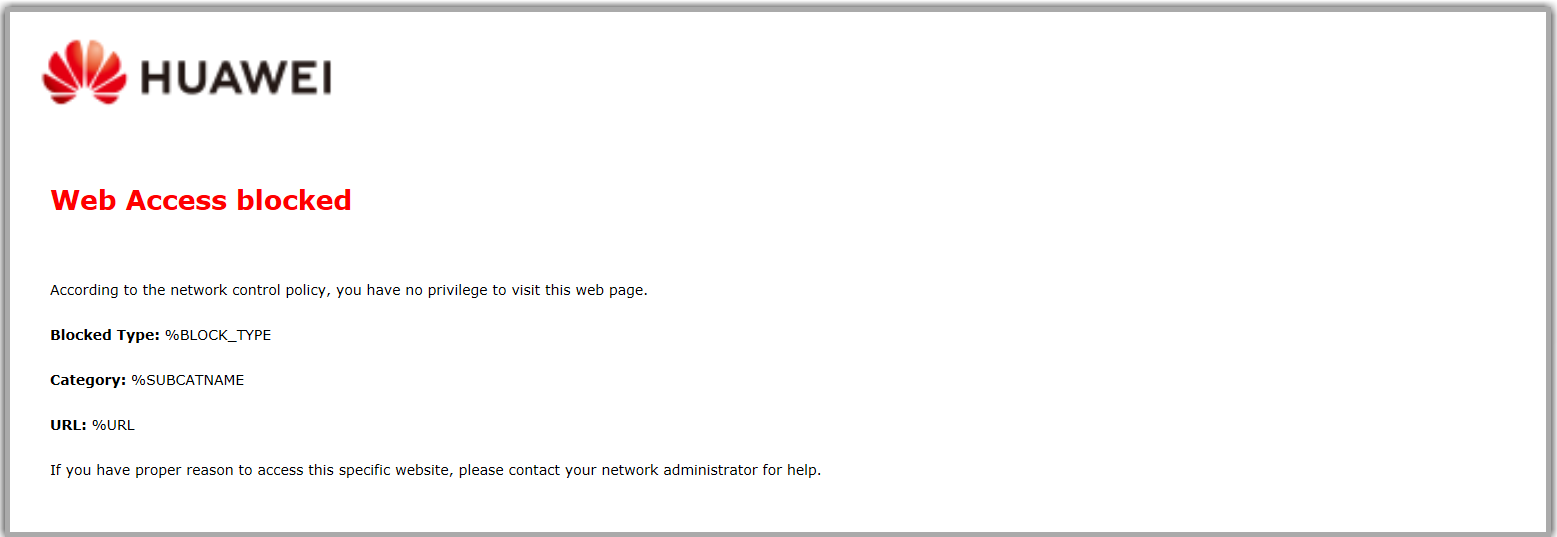
Find the position of the image to be inserted in the downloaded push information template, and insert the image content <img style="margin-top:10px" src="data:image/png;base64,XXXX"> to the position. Replace XXXX with the Base64 code generated by the image encoding tool and save the HTML file.

The image has been embedded in the push information template. The effect is as follows.
Maintaining Information Push
You can perform the following operations to modify notifications or restore default notifications:
Click Export of the notification to be modified to download the notification file. Then edit the downloaded notification and import the file into the FW.
Click Reset corresponding to the notification to be modified to restore the default notification in the current virtual system.
If you perform the reset operation in the root system, the root system uses the default notification of the FW.
If you perform the reset operation in the virtual system, the virtual system uses the notification configured in the root system; if the default notification of the root system has not been modified before you perform the reset operation, the virtual system uses the default notification of the FW.