Web: Example for Configuring 802.1x Authentication
Networking Requirements
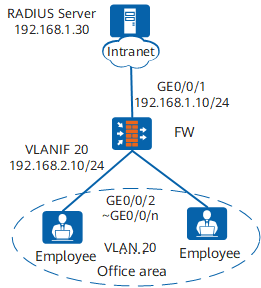
In Figure 1, terminals in a company's offices are connected to the company's intranet through the FW. GE0/0/2 to GE0/0/n on the FW are directly connected to terminals in offices. GE0/0/1 on the FW is connected to the RADIUS server through the intranet.
To meet the company's high security requirements, configure 802.1x authentication, use the RADIUS server to authenticate terminals in offices, and deploy authentication points GE0/0/2 to GE0/0/n of the FW.
Configuration Roadmap
The configuration roadmap is as follows:
- Configure network interworking.
- Configure RADIUS server.
- Configure an authentication domain, set the access type to 802.1X, and set the authentication mode to RADIUS server authentication.
- Configure 802.1x authentication to control network access rights of the employees in offices.

Before performing the following operations, ensure that there are reachable routes between user terminals and the server.
If the LAN switch exists between the FW and users. To ensure that users can pass 802.1x authentication, you must configure the EAP packet transparent transmission function on the LAN switch. The S5700 is used as an example of the LAN switch. Perform the following operations:
- Run the l2protocol-tunnel user-defined-protocol 802.1x protocol-mac 0180-c200-0003 group-mac 0100-0000-0002 command in the system view of the LAN switch to configure the LAN switch to transparently transmit EAP packets.
- Run the l2protocol-tunnel user-defined-protocol 802.1x enable and bpdu enable commands on the interface connecting to users and the interface connecting to the FW to enable the Layer 2 protocol transparent transmission function.
Procedure
- Configure network interworking.
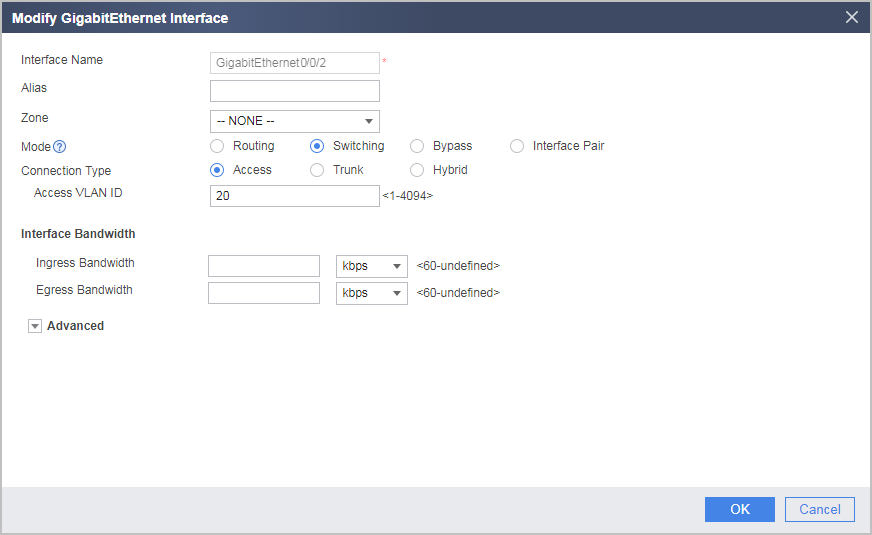
- Configure GE0/0/2 to GE0/0/n connecting the FW to users as access interfaces and add the interfaces to VLAN 20. The following uses the configuration of GE0/0/2 as an example. The configurations of other interfaces are similar to the configuration of GE0/0/2, and are not mentioned here.
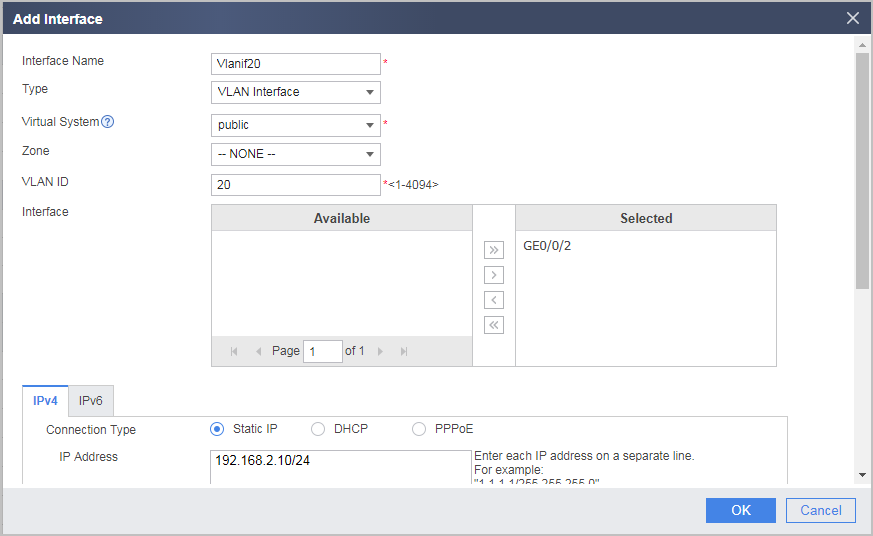
- Configure VLANIF 20.
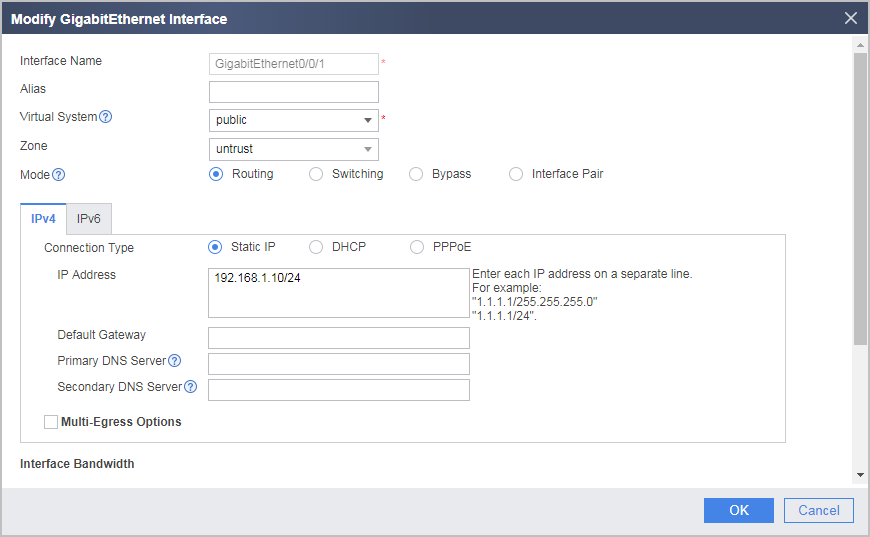
- Configure GE0/0/1 connecting the FW to the RADIUS server.
- Configure GE0/0/2 to GE0/0/n connecting the FW to users as access interfaces and add the interfaces to VLAN 20. The following uses the configuration of GE0/0/2 as an example. The configurations of other interfaces are similar to the configuration of GE0/0/2, and are not mentioned here.
- Configure RADIUS server.
- Choose .
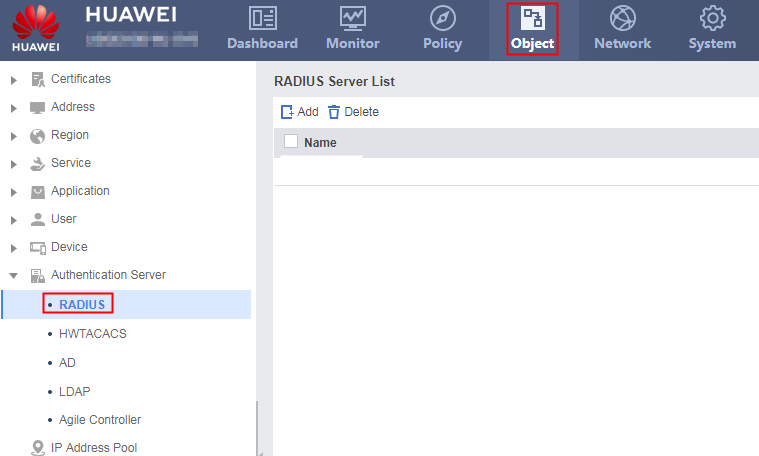
- Click Add and configure RADIUS server.
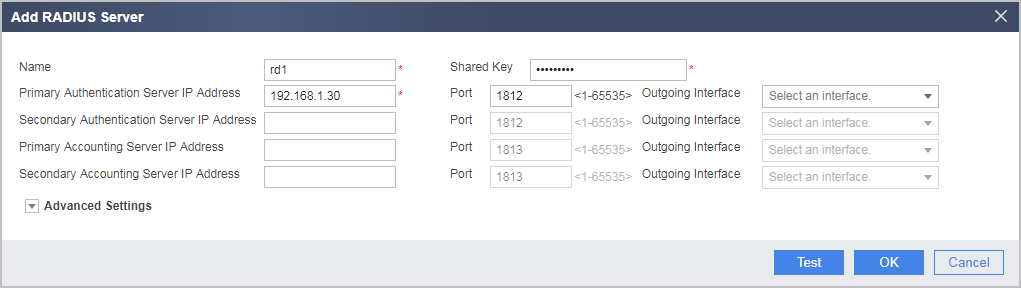
- Choose .
- Configure authentication domain.
- Choose .
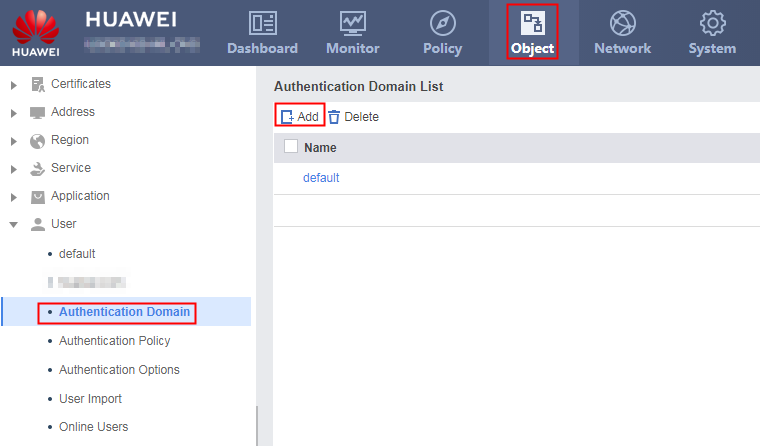
- Click Add and create authentication domain huawei.com.
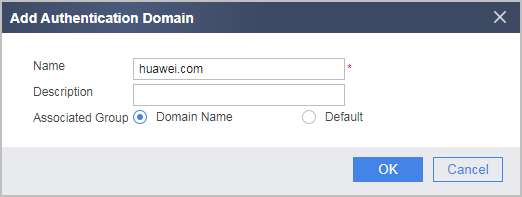
- Choose and configure authentication domain.
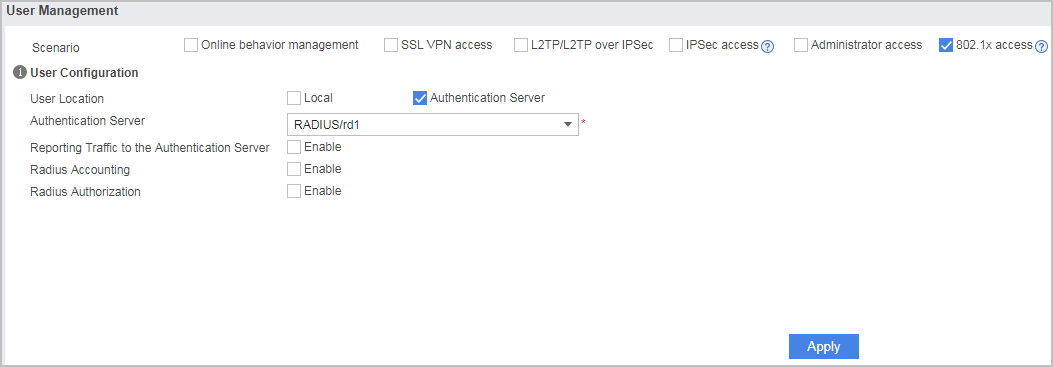
- Choose .
- Configure 802.1x authentication.
- Choose .
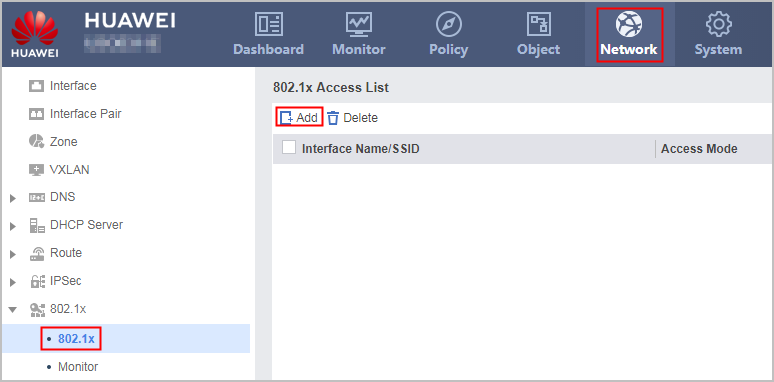
- Click Add and configure 802.1x access.
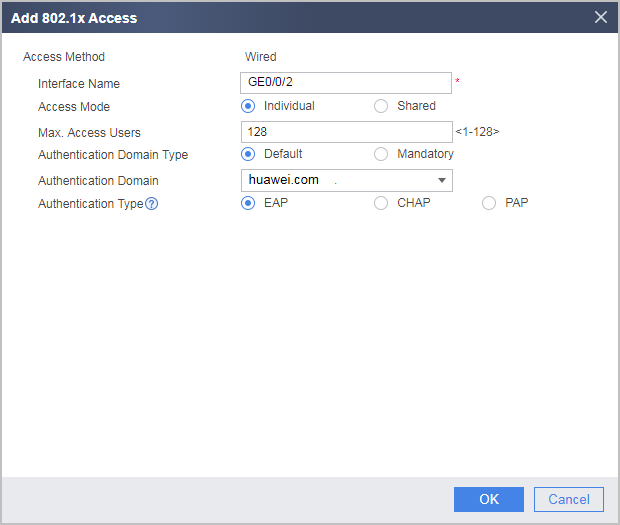
By default, an 802.1x access profile uses the EAP authentication mode. Ensure that the RADIUS server supports EAP; otherwise, the server cannot process 802.1x authentication request packets.
- Choose .
- Verify the configuration.
- A user starts the 802.1x client on a terminal, and enters the user name and password for authentication.
Some clients upload the client version number to the FW by default. The FW cannot parse the version number. Therefore, disable these clients from uploading the client version number to the FW.
- If the user name and password are correct, an authentication success message is displayed on the client page. The user can access the network.
- After users go online, you can choose to view information about online 802.1x authentication users.
- A user starts the 802.1x client on a terminal, and enters the user name and password for authentication.
Configuration Files
#
sysname FW
#
vlan batch 20
#
authentication-profile name p1
 dot1x-access-profile d1
 access-domain huawei.com force
#
radius-server template rd1
 radius-server shared-key cipher %^%#4*SO-2u,Q.\1C~%[eiB77N/^2wME;6t%6U@qAJ9:%^%#
 radius-server authentication 192.168.1.30 1812 weight 80
#
aaa
 authentication-scheme abc
    authentication-mode radius
 domain huawei.com
  authentication-scheme abc
  radius-server rd1
  service-type dot1x

#
interface Vlanif20
 ip address 192.168.2.10 255.255.255.0
#
interface GigabitEthernet 0/0/1
 ip address 192.168.1.10 255.255.255.0
#
interface GigabitEthernet 0/0/2
 portswitch
 port link-type access
 port default vlan 20
 authentication-profile p1
#
firewall zone trust
 add interface Vlanif20
#
firewall zone untrust
 add interface GigabitEthernet0/0/1
#
dot1x-access-profile name d1
#
security-policy
 rule name policy_sec_01
  source-zone trust
  destination-zone local
  action permit
 rule name policy_sec_02
  source-zone local
  destination-zone trust
  action permit
 rule name policy_sec_03
  source-zone local
  destination-zone untrust
  destination-address 192.168.1.30 32
  action permit
#
return