Methods for Configuring Security Policies
This section describes how to create security policies.
Directly Creating or Inserting Security Policies
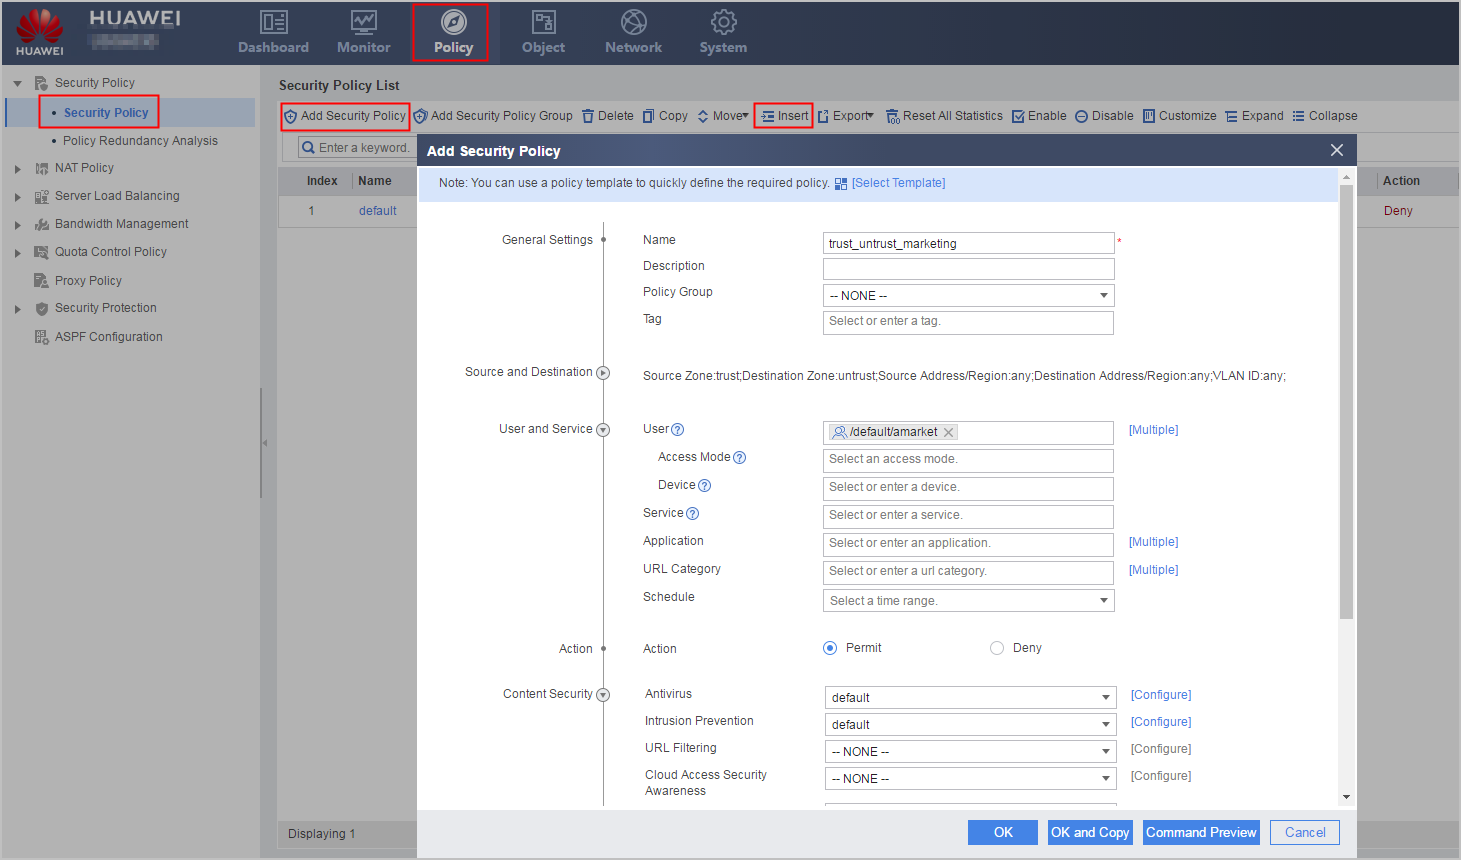
You can create a security policy or insert a security policy before an existing security policy as required. For example, an enterprise allows users in the marketing department to browse Internet pages and checks the browsed content to prevent viruses and hacker attacks. Create a security policy as follows:
Using a Template
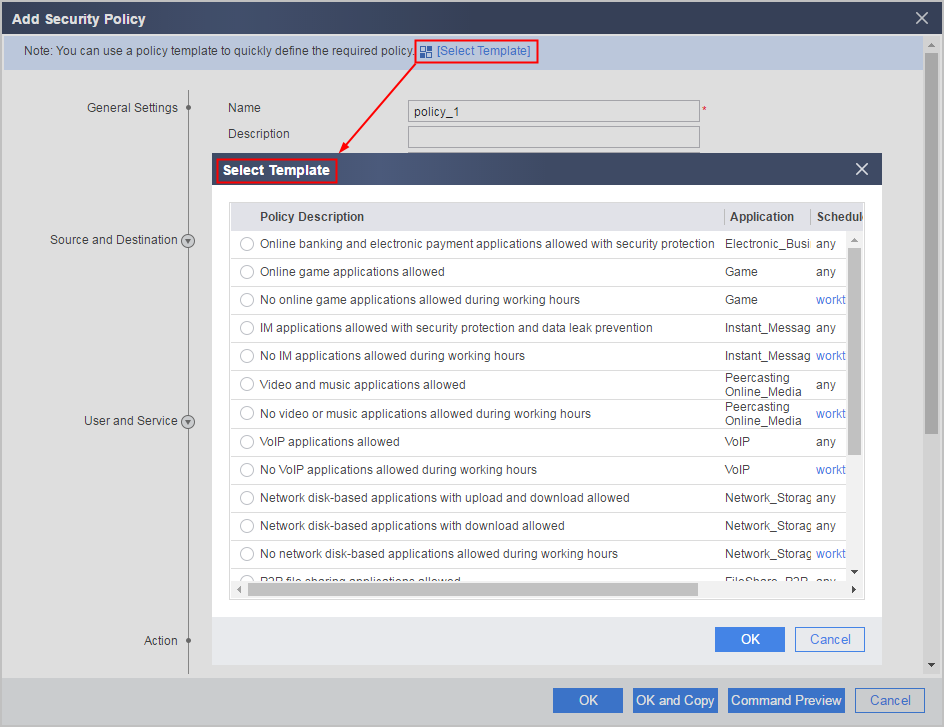
Select a template if the settings, such as application category, time range, action, and data security measures, in the template suit your needs.
For example, if an enterprise prohibits employees from using online game applications during working hours, select the following template:
In addition, the system has an implicit deny any policy. Traffic that does not match any security policy is discarded.
Replicating a Security Policy
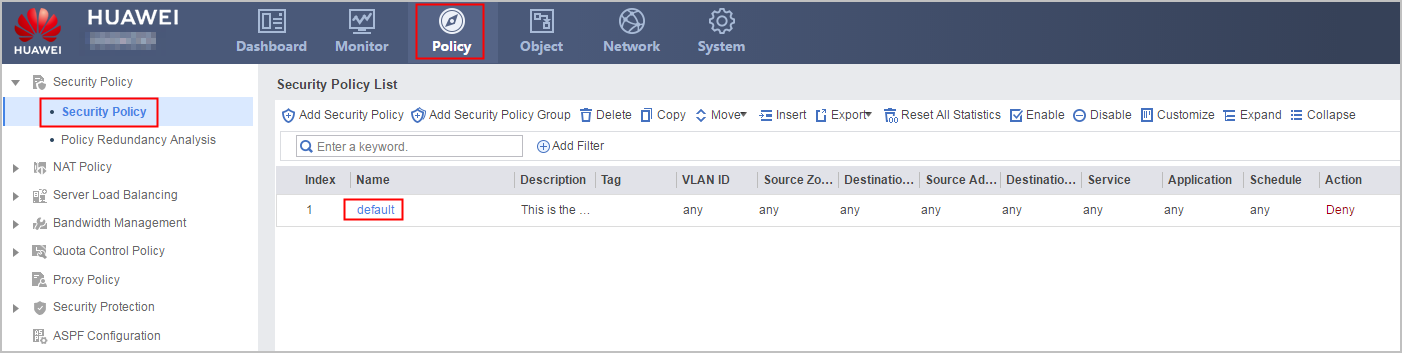
If the security policy rule to be created is similar to an existing security policy rule, you can replicate the existing security policy rule to create the new security policy rule.
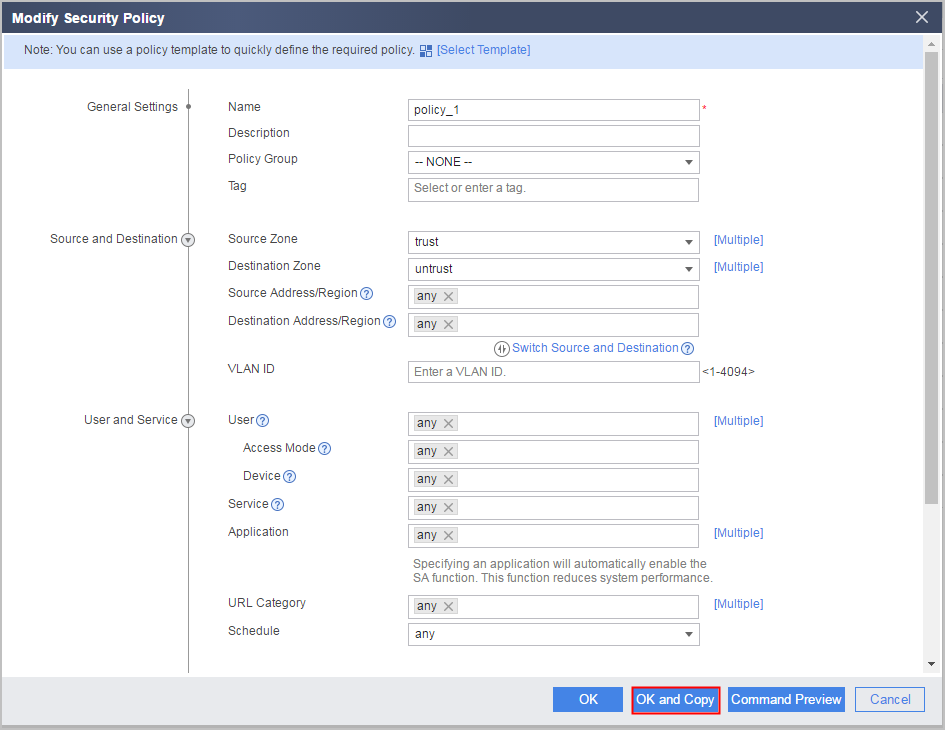
To copy a newly created policy, click OK and Copy. Confirm the created policy, and the system prompts the Copy Security Policy window. In Copy Security Policy, edit the policy name and rule and click OK to complete copying the policy.
In addition, you can also perform the OK and Copy operation for an edited, copied, or inserted security policy.
Switching the Source and Destination
In this method, you can switch the source/destination security zone, source/destination address/region, and source/destination port of the protocol of a service in the matching condition.
You can click Switch Source and Destination to switch the source/destination security zone and source/destination address/region in the match condition and protocol source/destination port in the service respectively.

In the service match condition, port switch is performed only for protocols with the source and destination ports added in protocol or protocol ID mode but not for protocols with the source and destination ports added in the service or service group.
In Table 1 for example, during the IPSec VPN configuration, you need to configure security policies for both the inbound and outbound directions. In this case, after creating the forward security policy Policy1, you can click OK and Copy. Then click Switch Source and Destination in Copy Security Policy and change the policy name to Policy2 to complete configuring the reverse policy.
Rule Content |
Forward Security Policy |
Reverse Security Policy |
|---|---|---|
Policy name |
Policy1 |
Policy2 |
Source security zone |
untrust |
trust |
Destination security zone |
trust |
untrust |
Source address/region |
10.1.2.0/24 10.1.3.0/24 |
10.1.1.0/24 |
Destination address/region |
10.1.1.0/24 |
10.1.2.0/24 10.1.3.0/24 |
Service |
esp UDP:src-port:500;dst-port:0-65535 |
esp UDP:src-port:0-65535;dst-port:500 |