Web: Example for Configuring Intrusion Prevention to Protect Users on the Intranet
The intrusion prevention function protects the users and web servers on an enterprise intranet from attacks on the Internet.
Networking Requirements
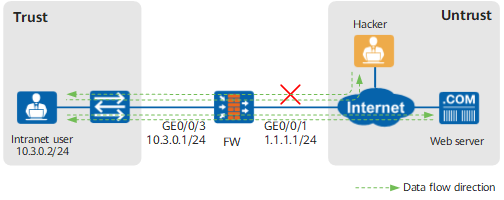
As shown in Figure 1, an enterprise deploys a FW as the security gateway at the network border. In the networking, an intranet user can access the Internet web server.
The enterprise wants to enable intrusion prevention on the FW to protect intranet users from attacks, such as an attacker launched from a website with malicious code, when the users access the Internet web server.
Data Planning
Based on the enterprise requirements, intrusion prevention must be configured as follows:
Set the severity of worms, Trojan horses, and botnets in signatures to High.
-
Configure security policies to filter traffic from the Internet web server to the intranet users.
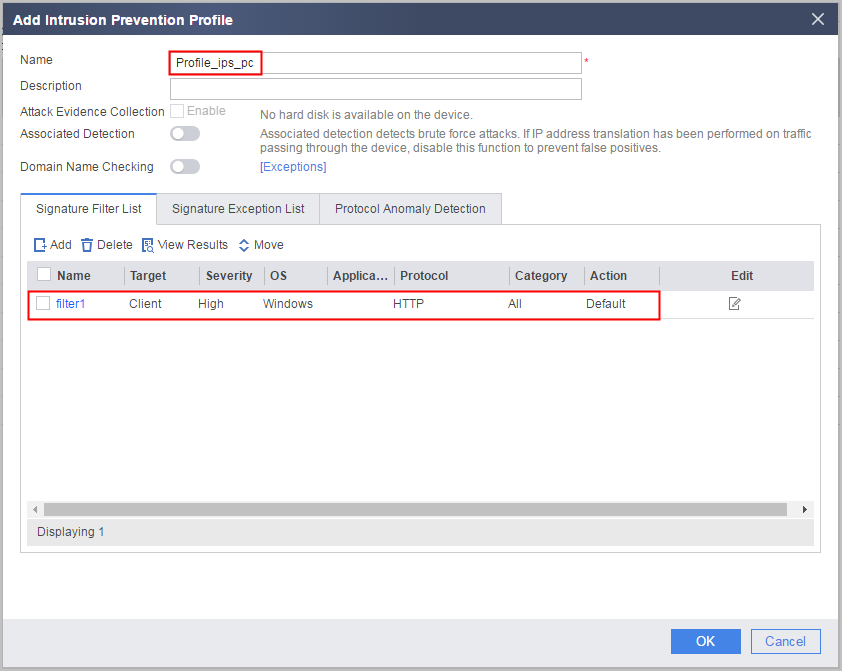
Attacks are caused by intranet users' access to the Internet web server and the target is the intranet users acting as a client. Therefore, set the protocol to HTTP, object to Client, and severity to High for the signature filter.
Table 1 shows the data planning for protecting the users on the intranet.
Table 1 Data planning for protecting the users on the intranet Item
Description
Intrusion prevention profiles
Name: Profile_ips_pc
Signature filter:- Name: filter1
- Object: Client
- Severity: High
- Protocol: HTTP
- Action: Default
Security policies
Name: policy_sec_1
- Source security zone: Trust
- Destination security zone: Untrust
- Source address/region: 10.3.0.0/24
- Service: HTTP
- Action: Permit
- Content security: Profile_ips_pc
Configuration Roadmap
- Configure scheduled IPS signature database update.
- Set interface IP addresses and assign the interfaces to security zones.
- Configure intrusion prevention profiles Profile_ips_pc and configure signature filters to satisfy security requirements.
- Create security policies policy_sec_1 that references profile Profile_ips_pc to protect intranet users from Internet attacks.
Procedure
- Configure scheduled IPS signature database update.
Configuring scheduled IPS signature database update can minimize false positives and false negatives. For configuration details, see Scheduled Update.
- Set interface IP addresses and assign the interfaces to security zones.
- Click
 of GE0/0/1 and set the parameters as follows.
Security zone
untrust
IPv4
IP address
1.1.1.1/24
- Click
- Create intrusion prevention profiles and configure signature filters.
- Choose .
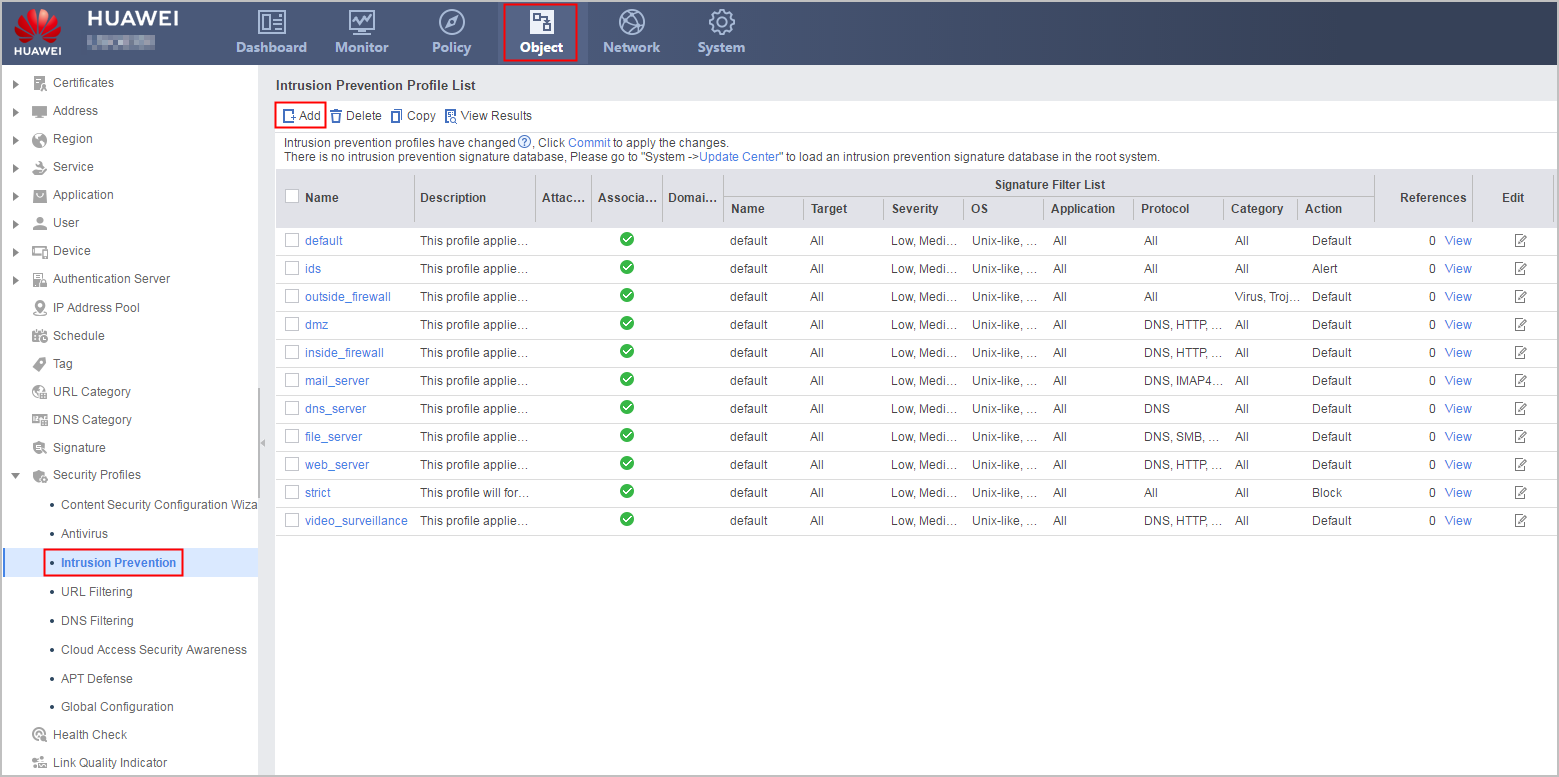
- In Intrusion Prevention Profile List, click Add and create Profile_ips_pc to be referenced by the security policy for the Trust -> Untrust interzone. Click OK to complete the configuration of the intrusion prevention profiles.

According to service requirements, you can set the actions of the signature filters to alert or default. Setting all actions to block is not recommended.
- Choose .
- Click Commit on the upper right and then click OK in the dialog box displayed.
- Configure security policies and apply the intrusion prevention profiles to the security policies.
- Click save on the upper right and then click OK in the dialog box displayed.
Result
After the intrusion prevention function is configured, an administrator who is familiar with the current network is in need to periodically check and adjust configurations so that intrusion behaviors can be detected and blocked without affecting services. When intranet servers are attacked, corresponding threat logs are generated. However, a large number of false positives may exist. To adjust configurations based on threat logs, perform the following steps:
Several examples are provided for your reference:
- Choose .
Determine whether an event is an attack based on the behavior of the threat source.
Example 1:
When viewing threat logs, you can find that an IP address from the Untrust zone continuously initiates intrusion attacks to multiple IP addresses in the destination security zone.
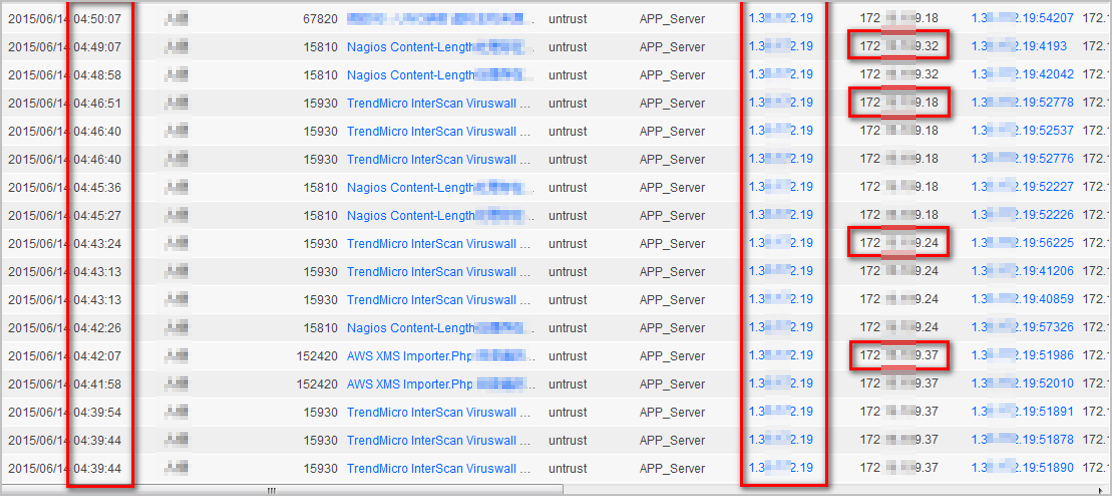
Enter the time range and IP address of the attack source in the search conditions to query the attack.
The search result shows that the attacker continuously initiates multiple types of intrusion attacks in a certain period of time. It can be confirmed that the attack source is initiating a malicious attack. In this case, configure the security policy to block traffic from this IP address to block the attack.
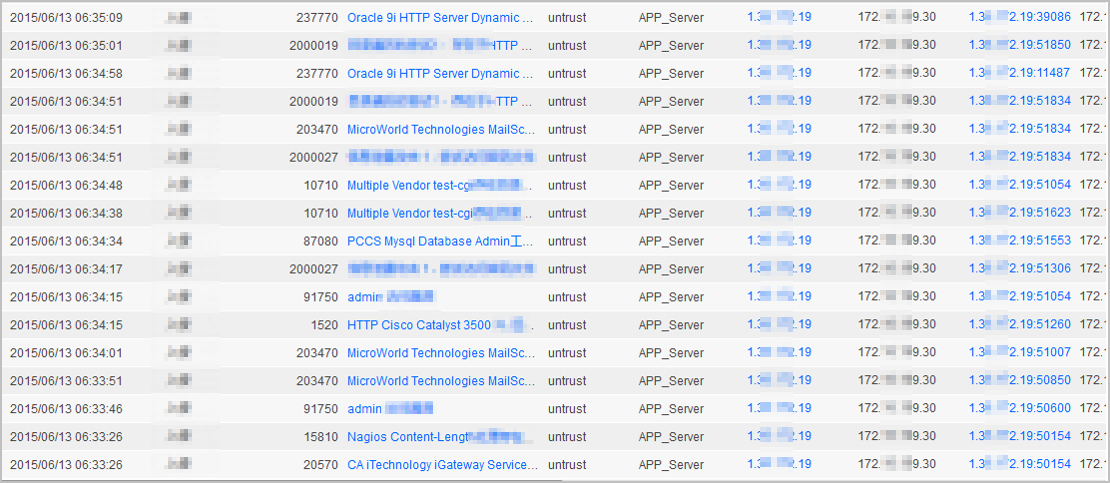
Based on the information about the threat event, check whether the event is an attack.
Certain attacks last for a short period of time, occur at a low frequency, and have only a few attack sources. This makes it difficult to identify the attack behavior based on the association between logs. In this case, you need to determine whether an event is an attack based on the information about the event.
Example 2:
When viewing threat logs, you can view several threat logs of the intrusion type, with a low occurrence frequency and only a few attack sources. In this case, you need to determine whether the event is an attack based on the information about the event.
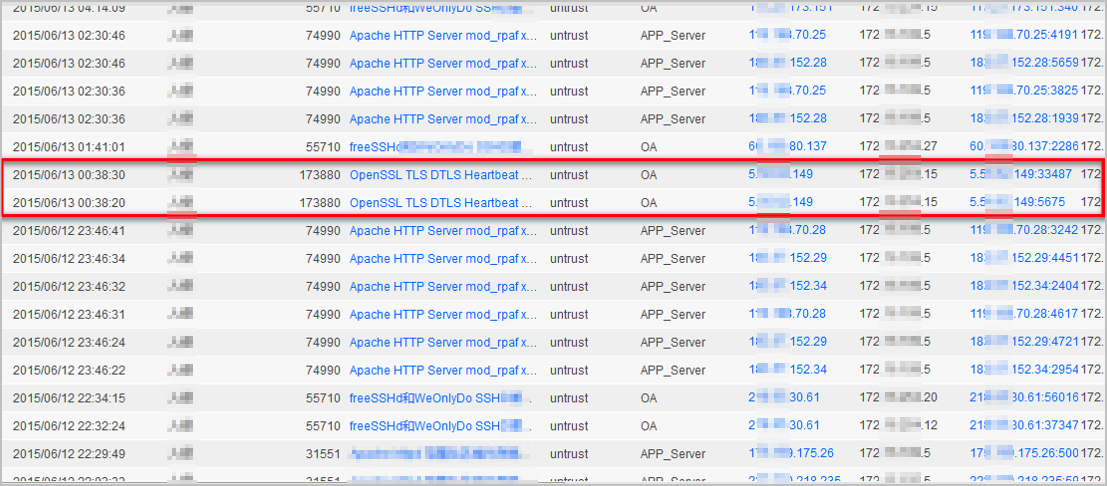
Choose and enter the threat ID recorded in the threat log in the search box. In the search result, click this signature to view details.
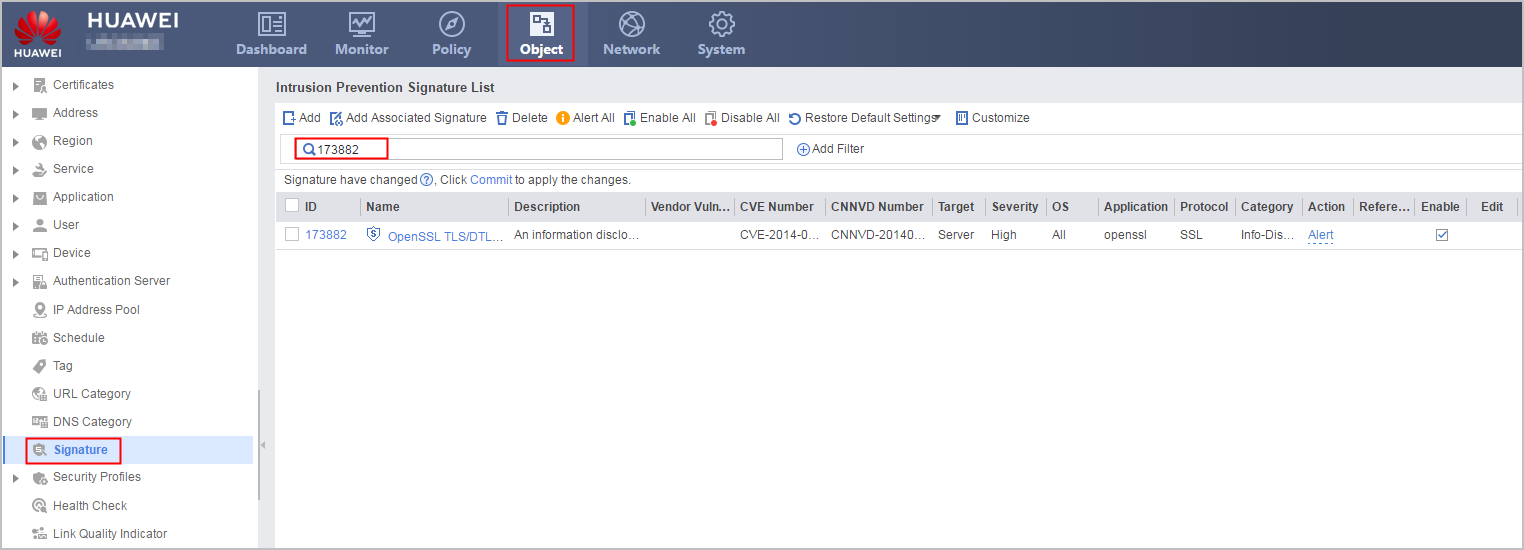
This vulnerability is a major OpenSSL vulnerability found at the end of 2014. It will cause information leaks and affect all software programs or services that use OpenSSL and is therefore graded as a high-risk vulnerability whose CVSS score is 10. This type of threat needs to be taken seriously, even if it occurs only once. You can block the threat or perform operations according to the countermeasure in the details.
-
You need to adjust existing configurations based on the acquired information about the attack. For example:
An attack may pose a threat in some scenarios, but may not in other scenarios, or even some special services may also have the threat feature. In this case, you need to identify whether the blocked threat is an attack in the existing network environment. If no, configure an exception signature and set the action to alert.
- In a scenario where security has a higher priority, if certain alarms are triggered by abnormal services and the behaviors comply with attack behaviors, you can configure them as exception signatures and set the actions to block.
- If a source IP address is identified as one with intrusion behaviors, you can blacklist it, or add it to the security policy rule and set the action to block.
Configuration Scripts
#
interface GigabitEthernet0/0/1
 undo shutdown
 ip address 1.1.1.1 255.255.255.0
#
interface GigabitEthernet0/0/3
 undo shutdown
 ip address 10.3.0.1 255.255.255.0
#
firewall zone trust
 set priority 85
 add interface GigabitEthernet0/0/3
#
firewall zone untrust
 set priority 5
 add interface GigabitEthernet0/0/1
#
profile type ips name Profile_ips_pc
 signature-set name filter1
  os windows
  target client
  severity high
  protocol HTTP
  category all
 #
security-policy
 rule name policy_sec_1
  source-zone trust
  destination-zone untrust
  source-address 10.3.0.0 mask 255.255.255.0
  service http
  profile ips Profile_ips_pc
  action permit