CLI: Example for Configuring the FW as an SFTP Server (RSA Authentication)
This section describes how to configure the FW as an SFTP server and how to download files from the FW through SFTP on a PC.
Networking Requirements
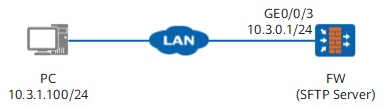
As shown in Figure 1, a PC is used to log in to the FW and download files from the FW through SFTP.
Data Planning
Item |
Data |
|---|---|
FW |
SFTP administrator account: sftpadmin_a Authentication type: RSA Bound client public key: key_pc Service type: SFTP |
Administrator PC |
SSH client software: PuTTY software (Windows 7 operating system). The PuTTY software contains the PuTTY client for the STelnet service, the SFTP client PSFTP, and key generation tool PuTTYgen. Name of the public key in the local RSA key pair: public Name of the private key in the local RSA key pair: private SSH connection: ssh-rsa |
Procedure
- Generate an RSA public key on the PC.
- Use the PuTTYgen tool to generate a local RSA key pair (the following uses PuTTYgen0.60 as an example).
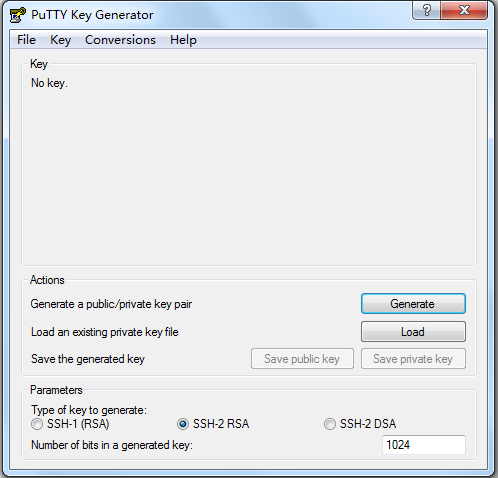
- Double-click PuTTYgen.exe. The interface shown in Figure 2 is displayed. In Parameters, set Type of key to generate to SSH-2 RSA. Click Generate. The PC starts to generate a local RSA key pair.
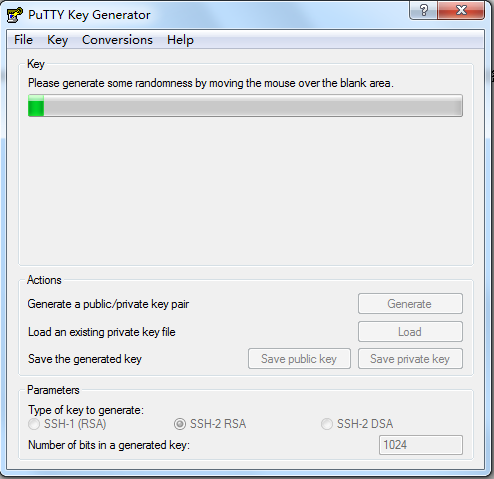
- Figure 3 shows the interface for generating a local RSA key pair. You must move the mouse continuously during the generation of the local RSA key pair. Move the pointer only in the window other than the progress bar in green. Otherwise, the progress bar suspends, and the generation of the key pair stops.
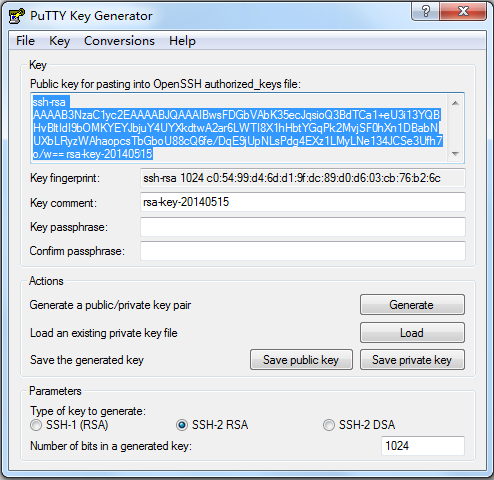
- Figure 4 shows the generation of the local RSA key pair. Do as follows to save the RSA key pair in the specified format:
- OpenSSH: Copy the marked content in the Key text box.
- PEM: Click Save public key, enter public for the name of the public key file, and click Save. Click Save private key, enter private for the name of the private key file, and click Save.

To enhance security, you must enter a password in the Key passphrase text box and enter the password again in the Confirm passphrase text box to set a password for using this key pair.
- Use the PuTTYgen tool to generate a local RSA key pair (the following uses PuTTYgen0.60 as an example).
- Configure the FW.
- Configure the administrator PC.
- Use the PuTTY to log in to the FW through SFTP (the following uses PuTTY0.60 as an example).
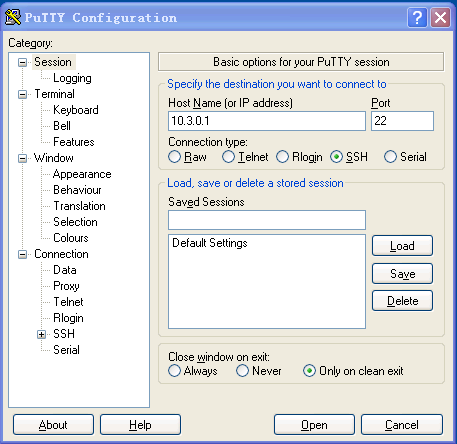
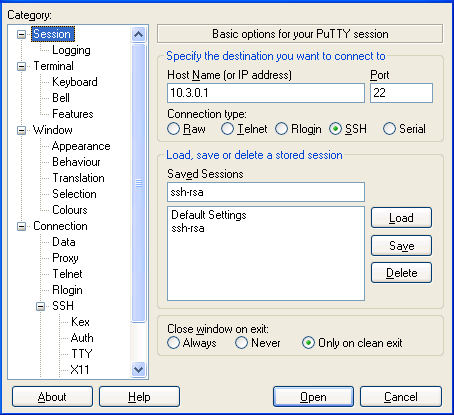
- Double-click PuTTY.exe. The interface shown in Figure 5 is displayed. Enter the IP address of the SSH server in the Host Name (or IP address) text box.
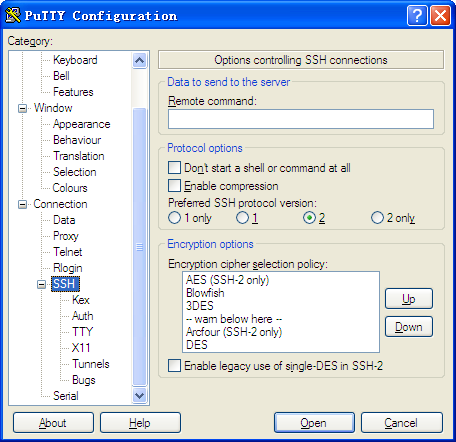
- Choose in the left Category navigation tree. The interface shown in Figure 6 is displayed. In the Protocol options area, set Preferred SSH protocol version to 2.
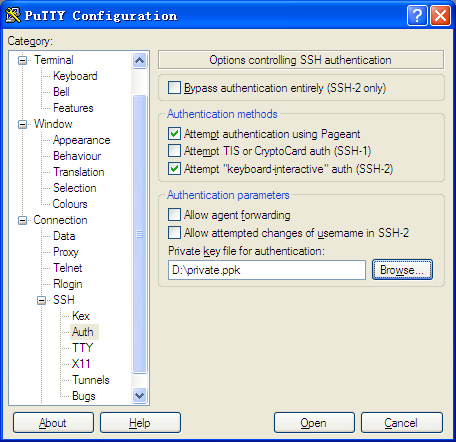
- Select Auth in SSH. The dialog box shown in Figure 7 is displayed. Click Browse, import the private key file private.ppk in the saved RSA key pair.
- Click Session, enter ssh-rsa in the Saved Sessions text box, and click Save to save the SSH session, as shown in Figure 8.
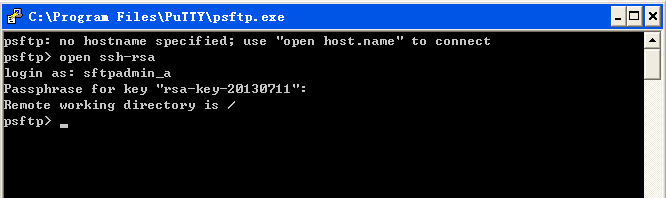
- Double-click PSFPT.exe, enter open ssh-rsa and press Enter (ssh-rsa is the name of the saved PyTTY session), and then enter SSH administrator account sshadmin_b and press Enter. You can access the file directory on FW, as shown in Figure 9.
- Use the PuTTY to log in to the FW through SFTP (the following uses PuTTY0.60 as an example).
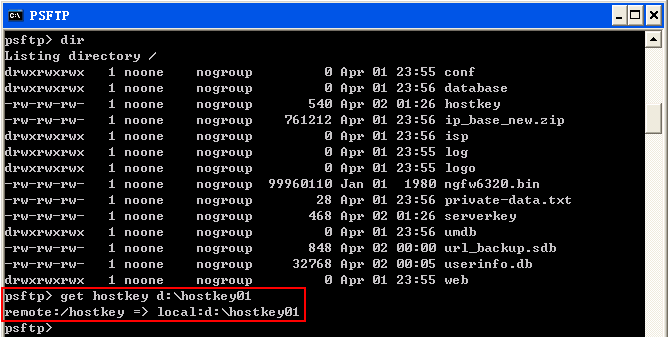
- Download files from the FW.Figure 10 Downloading files from the FW
Configuration Scripts
#
 sysname FW
#
rsa peer-public-key key_pc encoding-type openssh
 public-key-code begin
  ssh-rsa AAAAB3NzaC1yc2EAAAABJQAAAIBwsFDGbVAbK35ecJqsioQ3BdTCa1+eU3i13YQBHvBltI
dI
  9bOMKYEYJbjuY4UYXkdtwA2ar6LWTI8X1hHbtYGqPk2MvjSF0hXn1DBabNUXbLRyzWAhaopcsTbGbo
U8
  8cQ6fe/DqE9jUpNLsPdg4EXz1LMyLNe134JCSe3Ufh7o/w== rsa-key
 public-key-code end
peer-public-key end
#
aaa
 manager-user sftpadmin_a
  service-type ssh
  level 3
#
interface GigabitEthernet0/0/3
 ip address 10.3.0.1 255.255.255.0
 service-manage enable
 service-manage ssh permit
#
firewall zone trust
 set priority 85
 add interface GigabitEthernet0/0/3
#
sftp server enable
ssh user sftpadmin_a
ssh user sftpadmin_a authentication-type rsa
ssh user sftpadmin_a assign rsa-key key_pc
ssh user sftpadmin_a service-type sftp
ssh user sftpadmin_a sftp-directory hda1:
ssh user sftpadmin_a authorization-cmd aaa
#
user-interface vty 0 4
 authentication-mode aaa
 user privilege level 3
 protocol inbound all
#
security-policy
 rule name policy_sftp
  source-zone trust
  destination-zone local
  service ssh
  source-address 10.3.1.0 24
  action permit