Web: Example for Configuring Hot Standby in Load Balancing Mode Where Firewalls Are Deployed in In-path Mode and Connect to Switches in Upstream and Downstream Directions
This section provides a web example of configuring hot standby in load balancing mode in which the service interfaces of the firewalls work at Layer 3 and connect to switches in upstream and downstream directions.
Networking Requirements
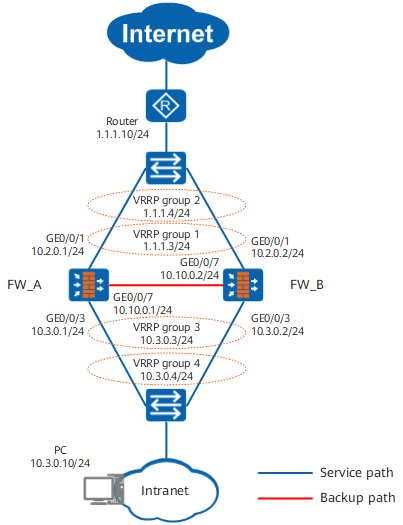
As shown in Figure 1, service interfaces of the two FW devices work at Layer 3, having upstream and downstream connections to Layer-2 switches. The upstream switch is connected to the carrier network, and the public IP addresses the carrier assigns to the enterprise are 1.1.1.3 and 1.1.1.4. Now the FW devices are supposed to work in load sharing mode. Normally, both FW_A and FW_B forward traffic. If either FW fails, the other FW forwards all traffic to ensure service continuity.
Procedure
- Configure interfaces and perform the basic network configurations.
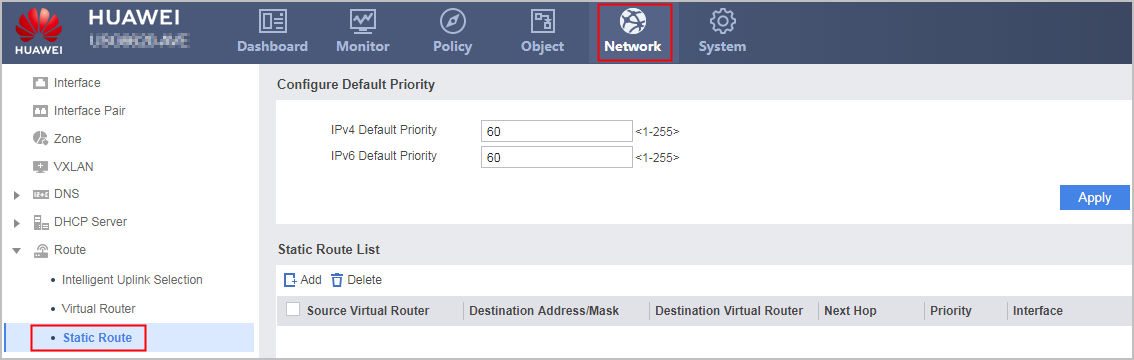
- Configure static routes.
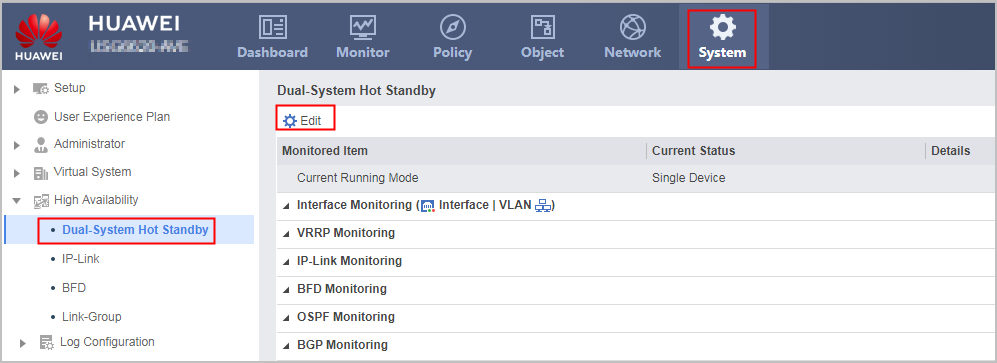
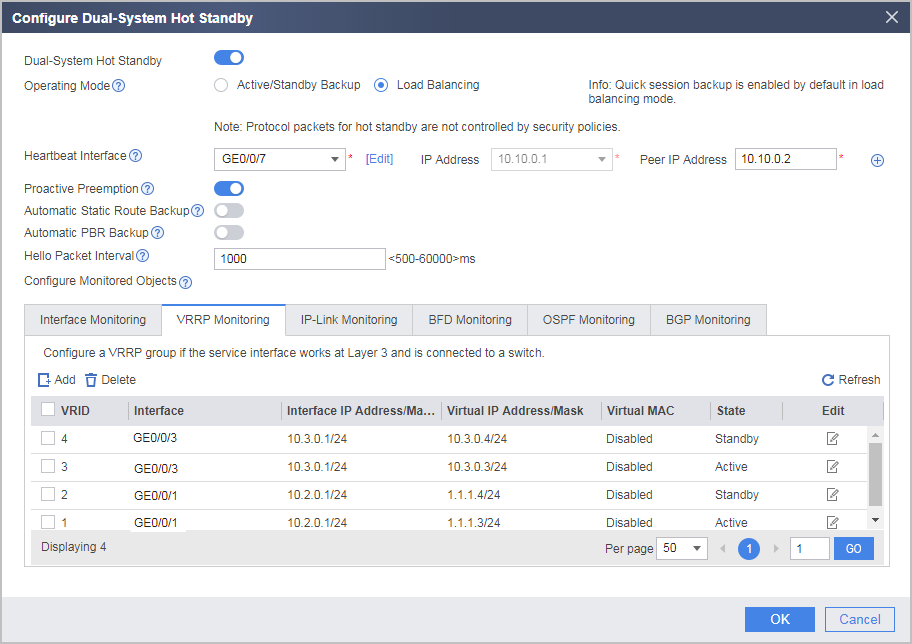
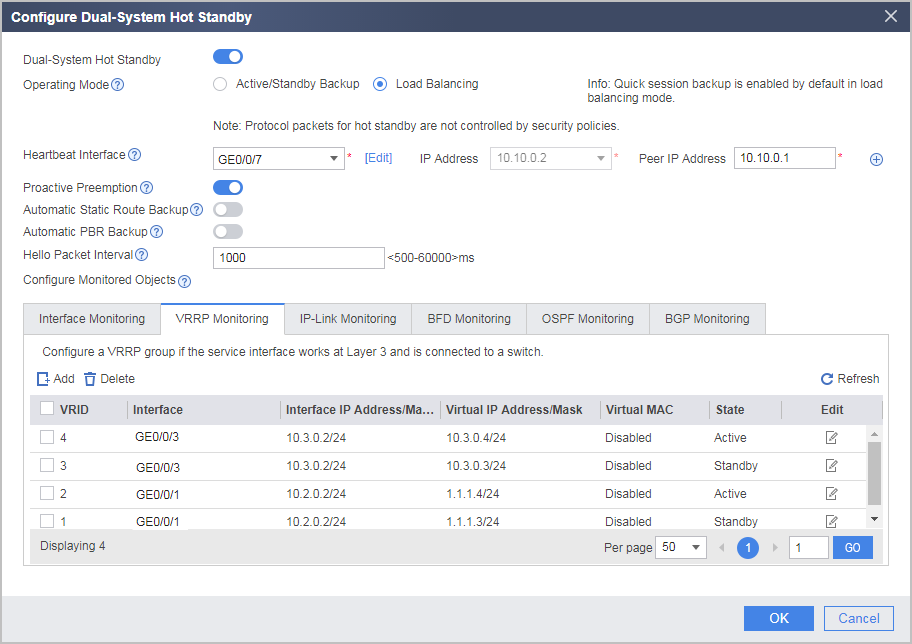
- Configure dual-system hot standby.
- Configure dual-system hot standby on FW_A.
- Configure dual-system hot standby on FW_B.
- To prevent port conflicts in address translation on the FWs in load balancing mode, configure available port ranges on FW_A and FW_B. Currently, the configuration cannot be performed on the web UI. Click CLI Console in the lower right corner of the page to display the CLI configuration page and configure it on the CLI.

In the hot standby load balancing scenario, If NAPT is configured, the FWs may have conflicting public ports. To prevent such conflicts, configure respective NAT resources (including public IP addresses and ports) for the FWs. You can run the hrp nat resource primary-group command on the active FW. The standby FW will automatically generate the hrp nat resource secondary-group command (if you run the hrp nat resource secondary-group command on the active FW, the standby FW will automatically generate the hrp nat resource primary-group command).
Perform the following configuration on FW_A:
HRP_M[FW_A] hrp nat resource primary-groupPerform the following configuration on FW_B:
HRP_S[FW_B] hrp nat resource secondary-group
- Configure default routes on the Intranet devices to set virtual IP address 10.3.0.3 of VRRP backup group 3 as the next hop for certain devices and virtual IP address 10.3.0.4 of VRRP backup group 4 as the next hop for the other devices.
- Configure a security policy.
The security policy configurations on FW_A will be automatically backed up to FW_B.
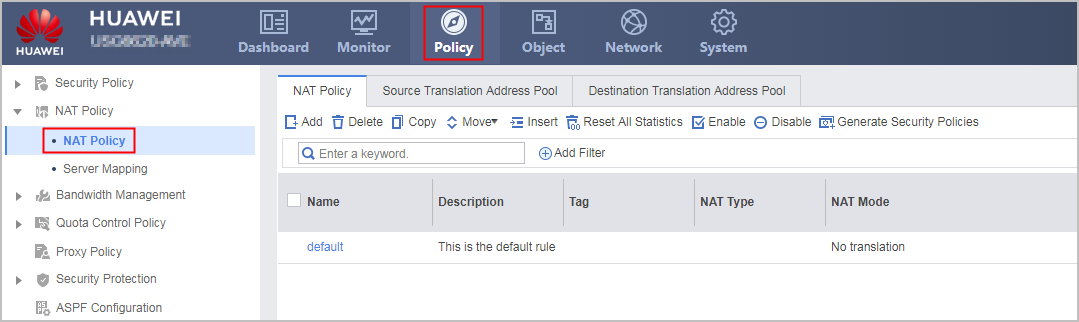
- Configure a NAT policy to allow intranet users to access the Internet.
NAT policies configured on FW_A are automatically backed up to FW_B.
- Choose .
- Choose .
Verification
Choose .
- Normally, Working Mode is Load Sharing for both FW_A and FW_B; Current Status is Active for FW_A and Active for FW_B. In this case, both FW forward traffic.
- If FW_A malfunctions, Working Mode is Active/Standby Backup for both FW_A and FW_B; Current Status is Standby for FW_A and Active for FW_B. In this case, FW_B only forwards traffic.
Configuration Scripts
FW_A |
FW_B |
|---|---|
# hrp mirror session enable hrp enable hrp interface GigabitEthernet 0/0/7 remote 10.10.0.2 hrp nat resource primary-group # interface GigabitEthernet 0/0/1 ip address 10.2.0.1 255.255.255.0 vrrp vrid 1 virtual-ip 1.1.1.3 255.255.255.0 active vrrp vrid 2 virtual-ip 1.1.1.4 255.255.255.0 standby # interface GigabitEthernet 0/0/3 ip address 10.3.0.1 255.255.255.0 vrrp vrid 3 virtual-ip 10.3.0.3 active vrrp vrid 4 virtual-ip 10.3.0.4 standby # interface GigabitEthernet 0/0/7 ip address 10.10.0.1 255.255.255.0 # firewall zone trust set priority 85 add interface GigabitEthernet 0/0/3 # firewall zone dmz set priority 50 add interface GigabitEthernet0/0/7 # firewall zone untrust set priority 5 add interface GigabitEthernet 0/0/1 # ip route-static 0.0.0.0 0.0.0.0 GigabitEthernet 0/0/1 1.1.1.10 # nat address-group addressgroup1 0 section 0 1.1.2.5 1.1.2.8 # security-policy rule name policy_sec source-zone trust destination-zone untrust source-address 10.3.0.0 24 action permit # nat-policy rule name policy_nat source-zone trust destination-zone untrust action source-nat address-group addressgroup1 |
# hrp mirror session enable hrp enable hrp interface GigabitEthernet 0/0/7 remote 10.10.0.1 hrp nat resource secondary-group # interface GigabitEthernet 0/0/1 ip address 10.2.0.2 255.255.255.0 vrrp vrid 1 virtual-ip 1.1.1.3 255.255.255.0 standby vrrp vrid 2 virtual-ip 1.1.1.4 255.255.255.0 active # interface GigabitEthernet 0/0/3 ip address 10.3.0.2 255.255.255.0 vrrp vrid 3 virtual-ip 10.3.0.3 standby vrrp vrid 4 virtual-ip 10.3.0.4 active # interface GigabitEthernet 0/0/7 ip address 10.10.0.2 255.255.255.0 # firewall zone trust set priority 85 add interface GigabitEthernet 0/0/3 # firewall zone dmz set priority 50 add interface GigabitEthernet0/0/7 # firewall zone untrust set priority 5 add interface GigabitEthernet 0/0/1 # ip route-static 0.0.0.0 0.0.0.0 GigabitEthernet 0/0/1 1.1.1.10 # nat address-group addressgroup1 0 section 0 1.1.2.5 1.1.2.8 # security-policy rule name policy_sec source-zone trust destination-zone untrust source-address 10.3.0.0 24 action permit # nat-policy rule name policy_nat source-zone trust destination-zone untrust action source-nat address-group addressgroup1 |